|
Installation
of Vegetated Riprap
TECK
COMINCO METALS LTD RIVERBANK RESTORATION PROJECT
Go
To:
Riverbank
Section 1
Riverbank
Sections 2 and 1A
Survival
and Growth
Main
Riverbank Restoration Project Page
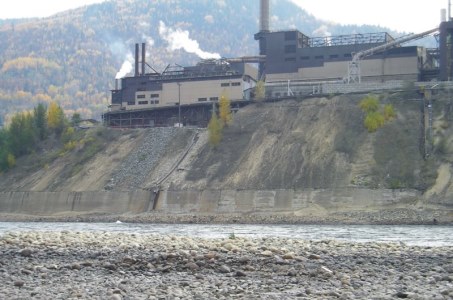
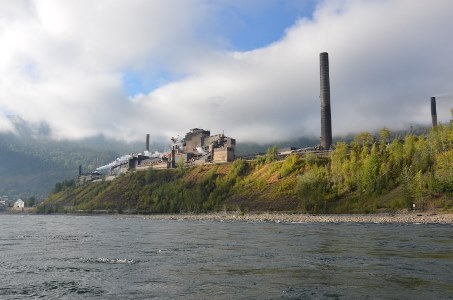
Location:
Bank
of Columbia River adjacent to the Teck Cominco lead-zinc
smelter in Trail, BC
Client:
Teck
Cominco Metals Limited
Objective:
Creation
of fish and wildlife habitat by establishing vegetation
within riprap revetment during road construction.
The
live cuttings used in the vegetated riprap applications
described below consisted of the following willow species
(Salix bebbiana/scouleriana/exigua) and (Salix
lucida ssp. lasiandra). Black Cottonwood (Populus
balsamifera ssp. trichocarpa) and Red-Osier Dogwood
(Cornus stolonifera).
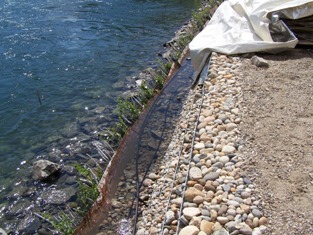
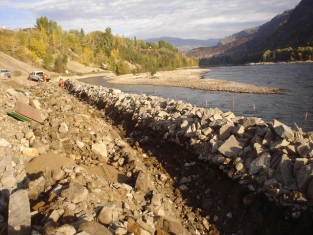
Riverbank
Section 1:
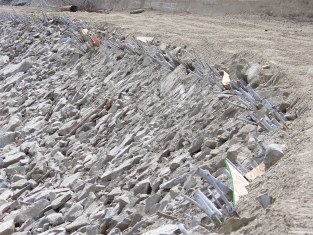
In
the installation of Section 1, live cutting pockets
and a vegetated riprap brush layer technique were used.
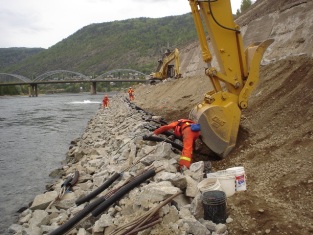
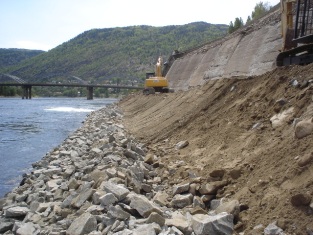
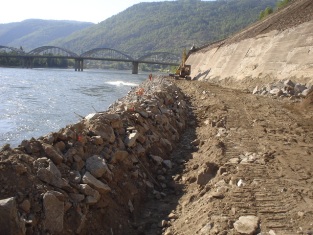
A
riprap toe apron was first constructed within the river
to support the additional riprap placed on the bank
above. A gravel layer was placed over the original excavated
bank in order to provide filtration of fine sediment
from entering the river. The first lift or layer of
riprap was then placed and live cutting pockets were
inserted into the bank above using an excavator and
manual labour.
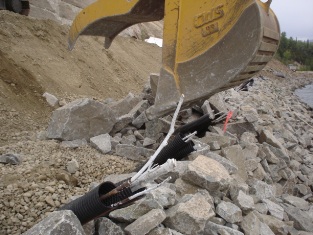
Each
pocket consisted of six cuttings contained within two
protective sleeves, slit to allow future expansion as
stems grow. For each pocket the excavator opened a planting
hole, into which the base of the cuttings were placed
manually along with water and custom soil amendments.
The plastic sleeves were positioned so that the cuttings
were protected when the next lift of riprap was placed
above. A total of four rows of live cutting pockets
were installed. A final lift of riprap was placed above
the highest rows. The elevation of each row of pockets
was maintained using a laser level as work progressed.
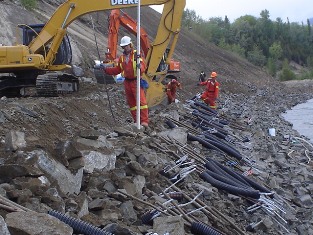
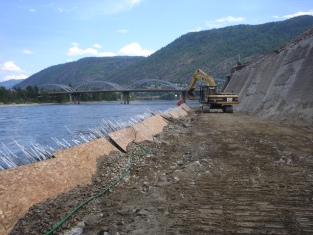
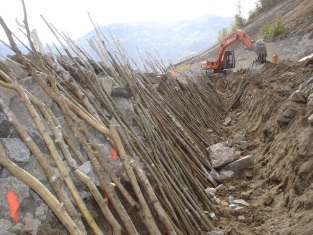
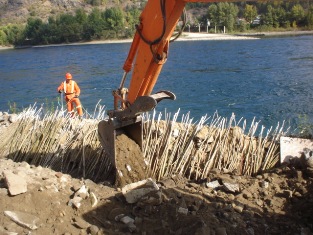
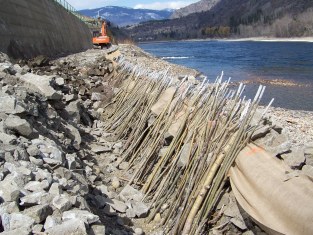
To
construct the vegetated riprap brush layer, a trench
was dug into the road sub-grade behind the last lift
of riprap. Live cuttings were laid out along this trench
so that the tips protruded above the adjacent riprap.
Water, topsoil and soil amendments were added prior
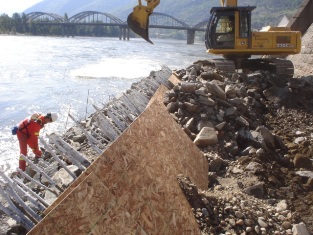
to backfilling of the trench using native soil material.
Protective wooden boards/sheets were then placed over
the lower portion of the exposed cuttings as protection
and final rock was placed to raise the road to the desired
sub-grade. |
|
Construction
of Section 1 toe apron, spring 2006
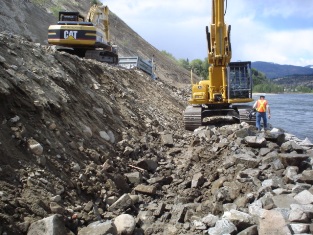
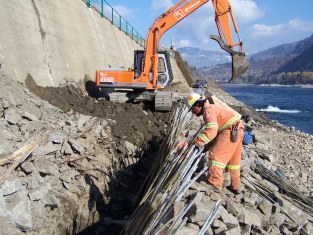
First
lift of riprap placed,
gravel
filter placed on bank
Inserting
live cutting pocket and watering
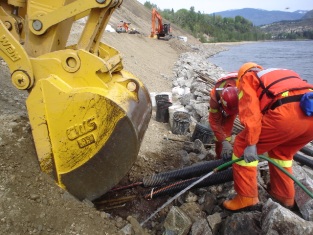
|
| |
|
Inserting
live cutting pocket
|
Placing
next lift of riprap
|
Inserting
live cutting pockets

|
Checking
elevation of riprap
|
| |
|
Excavated
trench for vegetated riprap
|
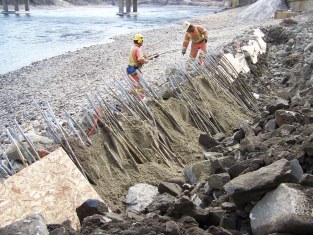
Live
cuttings placed in trench, trench being backfilled
with topsoil and native soil material
|
| |
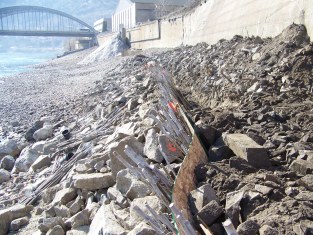
Protective
wooden sheets placed
|
Placing
riprap to final road sub-grade
|
| |
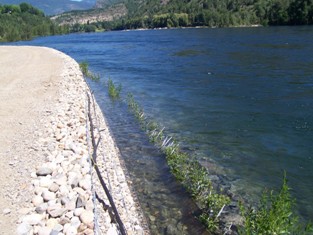
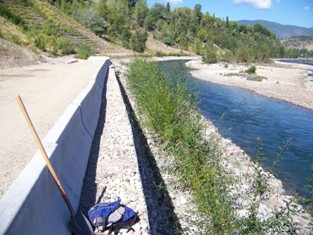
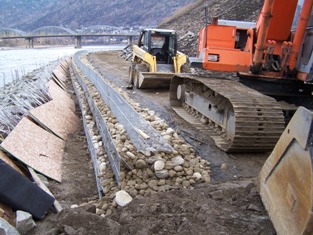
| Riverbank
Sections 2 and 1A:
Vegetated
riprap in Sections 2, constructed in 2006, and
1A, constructed in 2008, consisted of only one
row of the brush layers. The procedure was similar
to that outlined above for the vegetated riprap
brush layer in section 1.
A
trench was first excavated in the road sub-grade
behind the placed riprap, followed by:
1)
Placement of live cuttings in the trench.
2)
Watering and addition of soil amendments.
3)
Backfilling of the trench using topsoil and
native soil material.
4)
Placement of protective wooden sheets.
5)
Placement of riprap to complete the road sub-grade.
In
Section 2, a mechanically stabilized earth (MSE)
wall was constructed above the vegetated riprap
(see photos below).
In
Section 1A, a strip of burlap was placed over
the riprap prior to placement of the live cuttings
as added protection and to better hold the soil
before placement of the protective wooden sheets.
|
| |
Excavated
trench Section 2 vegetated riprap
fall
2006
|
Live
cuttings placed in trench
|
| |
Back-filling
trench
|
MSE
wall constructed above vegetated riprap, cobbles
were later placed over wooden sheets
|
| |
|
Excavated
trench for Section 1A and placement of cuttings,
spring 2008
|
Live
cuttings placed in trench with burlap
|
| |
Trench
back-filled and sand placed over live cutting
on riprap
|
Trench
back-filled to final sub-grade
|
| |
Completed
road
|
| |
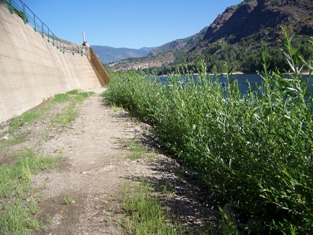
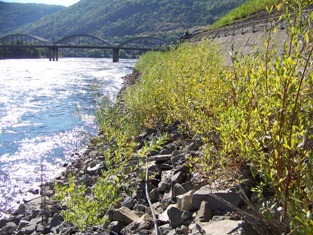
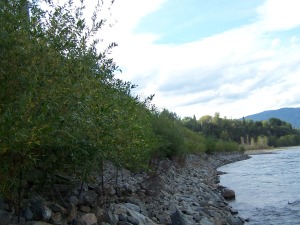
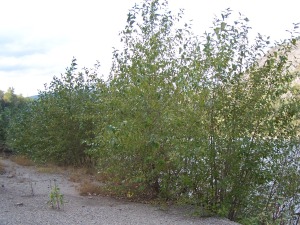
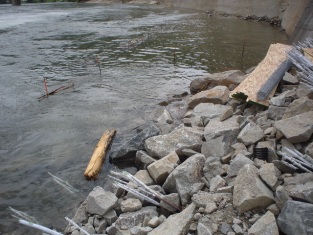
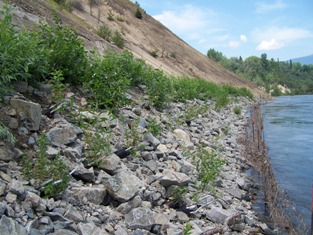
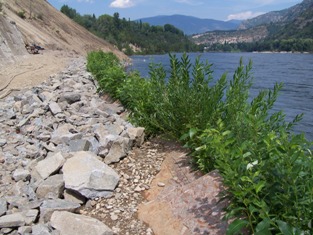
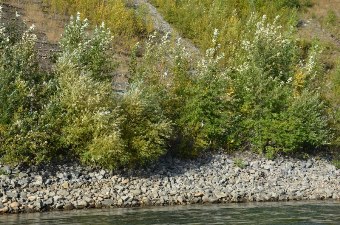
| Survival
and Growth:
The
survival and growth of vegetated riprap brush
layers installed along the riverbank has been
excellent to date. The survival of the lowest
rows of live pockets installed in Section 1 has
been poor, due to a prolonged flooding period
in the spring of 2006 and 2007. Survival of the
upper rows has, however, been relatively good.
In areas where the cuttings remained above the
water during flooding, survival has been good.
Link
to: Main
Riverbank Restoration Project Page |
| |
Lower
pockets in Section 1 under water during flooding,
spring 2006
|
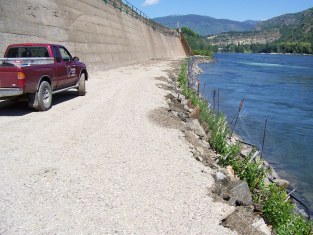
Section
1 summer, 2006
|
| |
Section
1, summer 2006
|
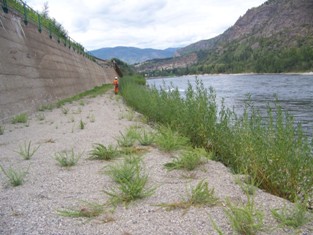
Section
1, summer 2008

|
| |
Section
1, summer 2008
|
| |
|
| |
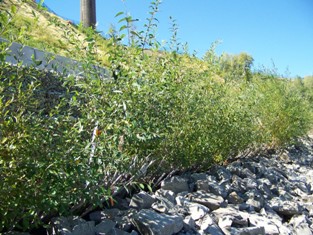
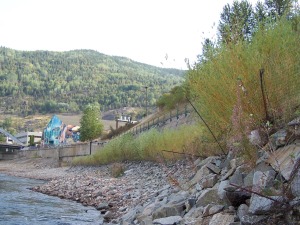
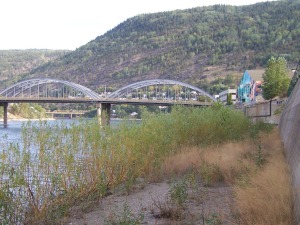
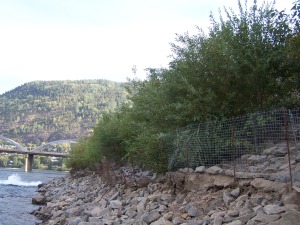
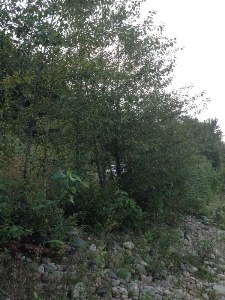
Section 1 South, summer 2010
|
| |
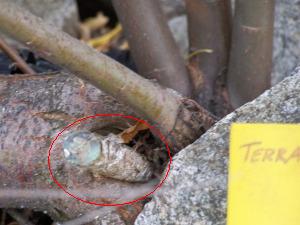
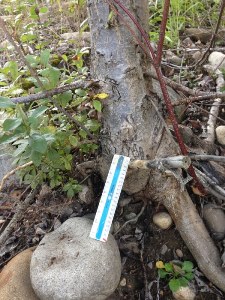
Growth on live cutting planted in riprap, 2010
(note: original live cutting in red circle)
|
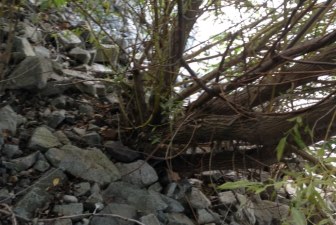
Salix lasiandra clump growth 2010
|
| |
Section 1 North, summer 2010 |
|
|
| |
Section
2 during flooding, spring 2007, note upper portion
of cuttings above water level
|
|
|
| |
Section
2, summer 2008 |
|
|
| |
Section
2, summer 2008
|
Section
1A, spring 2008
|
| |
Section
1A, summer 2008
|
| |
Section 1A South, summer 2010
|
|
|
| |
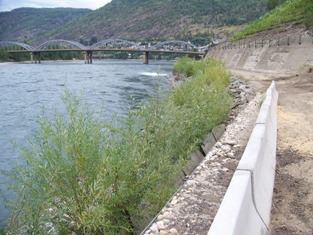
Section 1, summer 2010

|
| |
Section 1A, summer 2010

|
| |
Section 1, 1A and 2, summer 2010

|
| |
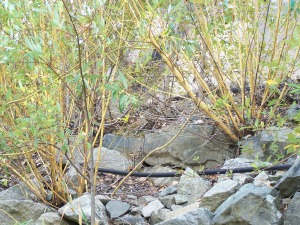
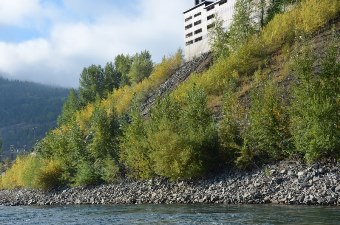
Section 1 Fall 2014
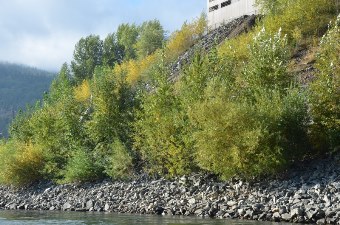
|
Section 1 Fall 2014
|
|
Section 1 Fall 2014
|
Section 1A Fall 2014

|
| |
Section 1 pocket 2014
|
| |
Section 3 Fall 2014
|
Section 3 Fall 2014
|
| |
Before, 2006
|
| |
Hillside Fall 2014
|
|

Copyright © 2010
Terra Erosion Control Ltd.
Vegetated Riprap |
|
|
|
|
|